Thursday, August 1, 2013
Hi again! On my last post, I configured an Android Virtual Device called NexusS_4.2.2. Before I run the HelloAndroid application, I am going to do a little modification to the application. Then, I am going to test the application in the previously created AVD and on my phone, which has Android version 4.1.2. This is the HelloAndroid application so far:
 |
| HelloAndroid Application |
It is the default project I created in Eclipse. As you can see, the default file activity_main.xml is already displaying the string “Hello world!”. I want to modify this string so it displays “Hello Android! =)” instead. To do this, right now you are on the Graphic Layout tab in Eclipse. Double Click the “Hello world!” string.
 |
| Hello world! string |
It will take you to the xml file tab with the string resource, which you just double clicked, highlighted blue.
 |
| hello_world resource |
As you can see, the name of the string resource is hello_world. To be able to modify this string, go to the Project Explorer and open the file strings.xml. This file is under the resource folder (res) then under the values folder in the Project Explorer. You will see an interface where you can add, edit, and remove Android resources.
 |
| Android Resources |
Examples of resources are strings, colors, and images. To modify the hello_world resource, click on the resource element on the left side. You should now see the attributes of the resource on the right side. I changed the name of the resource to hello_android and the value to “Hello Android! =)”.
 |
| hello_android resource |
Save the project and you should see the name of the resource change to hello_android on the left side. You can either modify the resource by using the Resources interface or you can access the strings.xml file by clicking the tab at the bottom next to the Resources tab.
 |
| strings.xml |
Change the resource string name hello_world to hello_android and its value to “Hello Android! =)”. In other words, the complete line will be:
<string name="hello_android">Hello Android! =)</string>
As you can see, the name and value of the resource changed on the Resources tab too after you save it. Since I changed the resource name, I have to also modify the activity_main.xml file. You probably see an error in Eclipse after you save the strings.xml file because the hello_world resource no longer exists.
 |
| activity_main.xml |
Change hello_world to hello_android on the activity_main.xml file and save it. The error should be corrected now. Right click the project folder in the Project Explorer and select Run As -> Android Application or click the green run icon on your toolbar to select Run As -> Android Application.
 |
| Run As Android Application |
If the emulator was off, it will take some time for it to start. You don’t have to close the emulator every time you want to run the application. Restarting the emulator will be like restarting an actual device. You should see the HelloAndroid application running after it starts.
 |
| Hello Android Application |
You can drag the application to the home screen like you would do in an actual device.
 |
| NexusS_4.2.2 Home Screen |
Now I want to run the application on my phone. To do this I need to download the USB driver. The driver you will need depends on the model of the phone. If the phone is a Nexus One, Android Developer Phone, or a Nexus S like the emulator we configured, you only need to download the Google USB driver found in the Android SDK Manager.
 |
| Android SDK Manager |
If you need another USB driver, here is a list of drivers : Drivers
After getting the USB driver, you need to enable USB Debugging on your phone. Since I got Android version 4.1.2, USB Debugging can be found on Settings -> Developer options. This applies to Android versions 4.0 or newer. For Android 3.2 or older, USB Debugging can be found on Settings -> Applications -> Development.
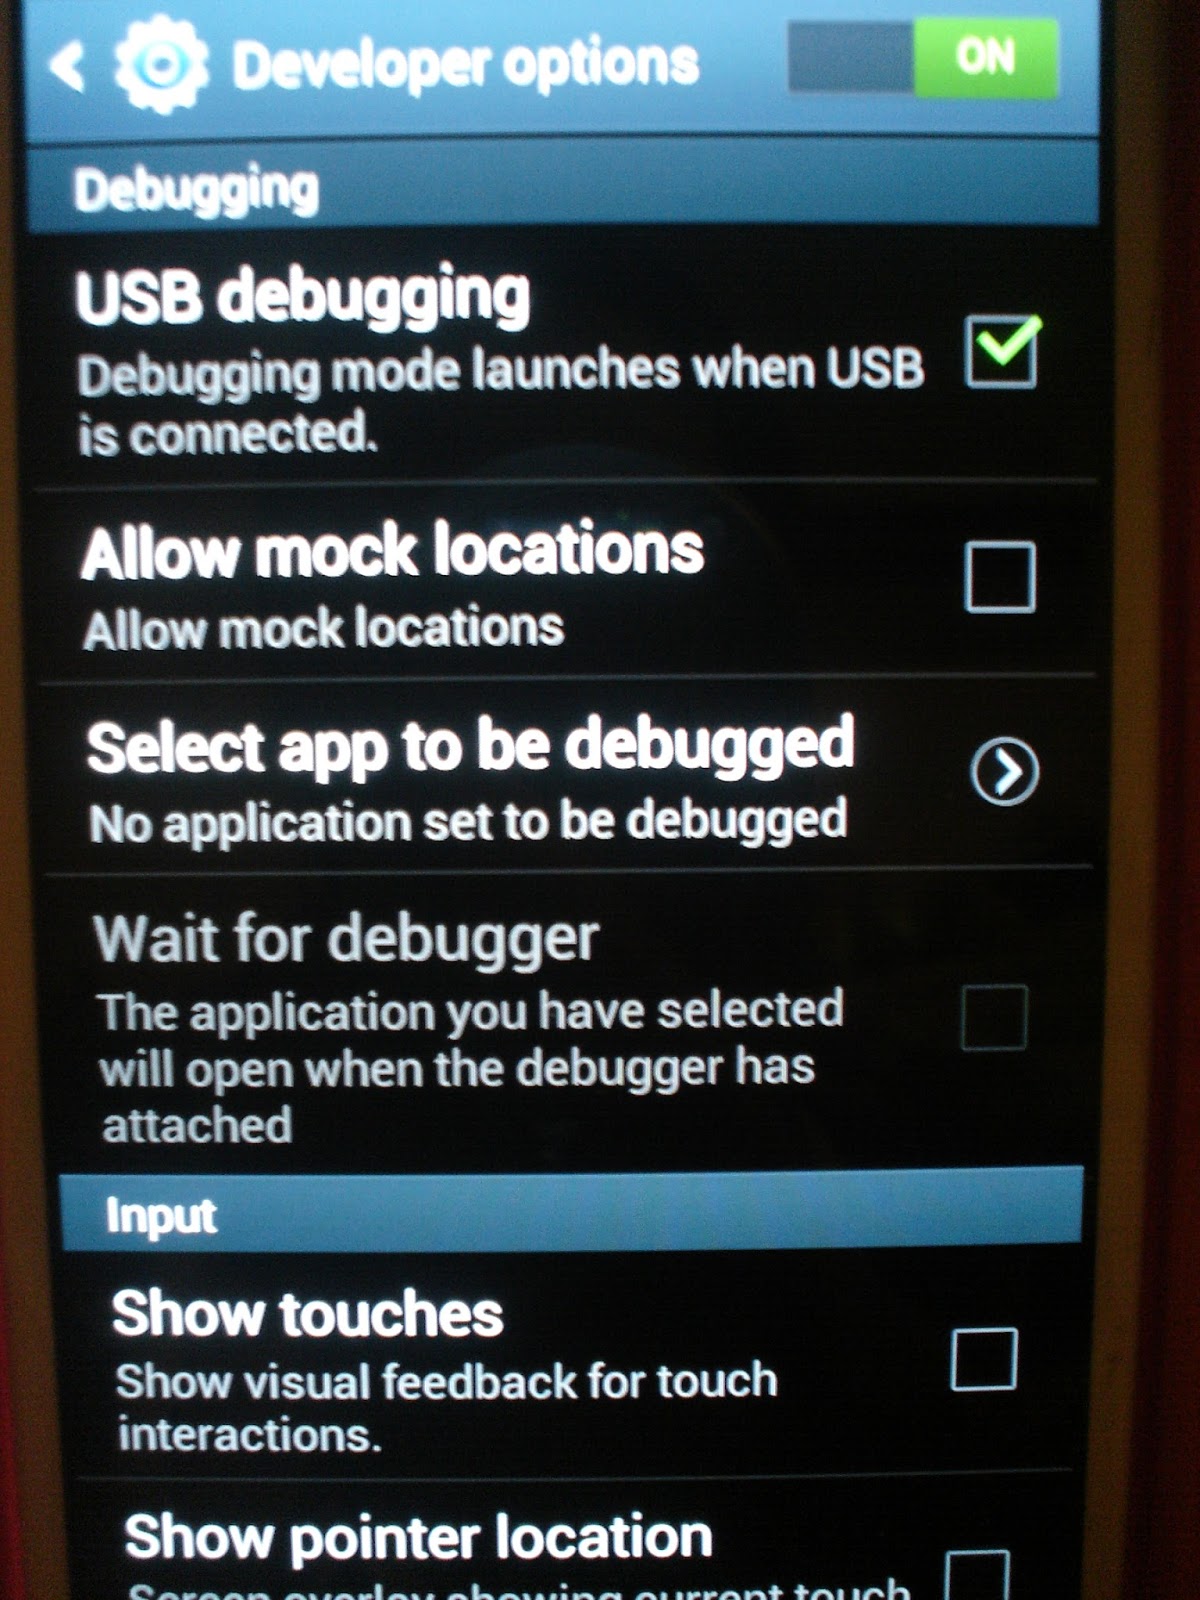 |
| Developer options |
I clicked on the run green icon on Eclipse once more and a new window called Android Device Chooser pops up.
 |
| Android Device Chooser |
In this window, select the radio button Choose a running Android device and click Ok. The HelloAndroid application should now be running on phone! Thank you for reading. Feel free to leave me comments or follow me by clicking Add to circles on Google+ Followers.
 |
| Hello Android Application on phone |


